Introducing GLLS’s new Tech Talk blog!
Since this is the first time we’re posting, it makes sense to start with the basics! Today we’re covering the (very) basic wiring for our various types of LED Neon Flex products.
This is to help you get your fixture connected to power. More complicated wiring with our DMX controllers will be covered later!
We’ve already stripped and pre-soldered our wire ends and prepared our power supply for wiring, so these steps are not covered in this post.
Basic Wiring For Static Color Fixtures
LED Neon Flex static color fixtures include any fixture that is unable to change its color. These fixtures do not require a decoder to connect to power, only a power supply!
Products:
- Vivid S 270 Blue Color Jacket LED Neon Flex Fixture (with snap connector ends)
- HLG-120H-24B power supply connected to a power cable
- Twist on wire connectors
Step 1

The first step is dependent on your power supply. If your power supply is like ours and has dimming wires (the white and blue wires shown), cap them off separately. These wires are used when you connect a 0-10V LED dimmer to the power supply and are not being used here. The wires must be capped separately or the power supply will “dim” to 0% and the light will not illuminate.
Step 2


Pair your soldered, stripped wires by color. Make sure to keep the same polarity together. The fixture will not illuminate if the + is connected to the – !
Step 3


Now, connect your fixture to power!
Back to top
Basic Wiring For Pixel Fixtures
Vivid Pixel LED Neon Flex products are 3-wire fixtures with self-adressing cutting units.

Products:
- Vivid Pixel 270° LED Neon Flex Fixture (with seamless ends)
- DMX512 Decoder (LT-DMX-1809)
- HLG-120H-24B power supply connected to a power cable
- Flathead 3/32″ (2.5mm) screwdriver
Step 1

The first step, again, is to cap off your power supply’s dimming wires (the white and blue wires shown), if your power supply has them. Remember to cap them separately to prevent the power supply “diming” to 0%!
Step 2
This is the LT-DMX-1809 DMX512 Decoder. For powering our fixture, we’re using the “input | output” section.

Connect your power supply to the decoder as shown. Make sure your polarity is correct, and that your power supply is not connected on the “output” side.
Step 3

Connect the soldered wires of your Vivid Pixel fixture to the “output” side of the decoder.
Red wire to DC+, yellow wire to DATA, and black wire to GND.
Step 4

Now, connect your fixture to power!
Back to top
Basic Wiring For RGB Fixtures
Vivid RGB LED Neon Flex products are 4-wire fixtures with color-changing abilities. RGB fixtures have the ability to fade between colors, but the entire fixture will change.

Products:
- Vivid Wave RGB LED Neon Flex Fixture (with seamless ends)
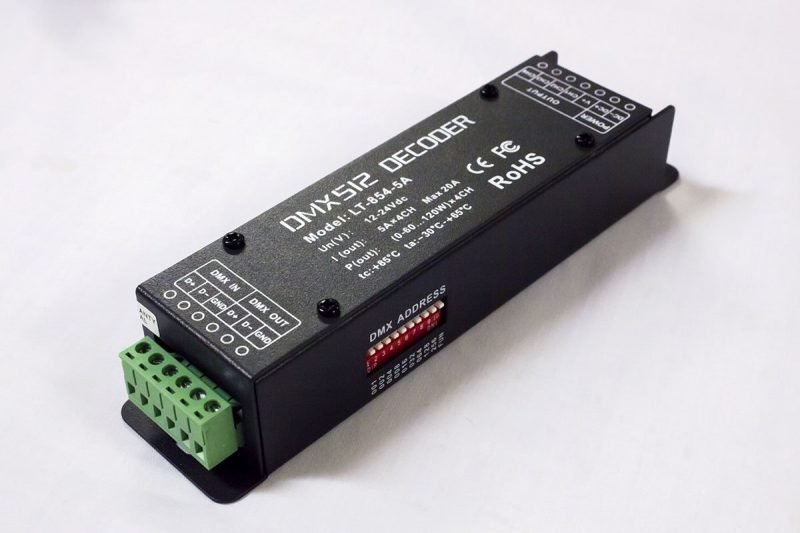
- DMX512 Decoder (LT-854-5A)
- HLG-120H-24B power supply connected to a power cable
- Flathead 3/32″ (2.5mm) screwdriver
Step 1

Start by capping off your power supply’s dimming wires (the white and blue wires shown), if your power supply has them. Remember to cap them separately!
Step 2

This is the LT-854-5A DMX512 Decoder. For powering our fixture, we’re using the “power | output” section.

Connect your power supply to the decoder as shown. Make sure your polarity is correct, and that your power supply is not connected on the “output” side.
Step 3

Connect the soldered wires of your Vivid RGB fixture to the “output” section of the decoder.
Yellow wire to V+, red wire to CH1, green wire to CH2, and blue wire to CH3.
Step 4

Now, connect your fixture to power!
Back to top
Check back in for our next Tech Talk; we’ll be covering how to test your fixtures before installation with the DMX Decoder!
Have any technical questions?


